Thursday 12 November 2009

The Characteristics of lighting. Andrew Farrington.


Lighting is an extremely important aspect in the photography world. It affects absoloutley every outcome of your imagery such as the quality, colour, contrast, intensity and evenness.


Even though daylight and moonlight are considered to be the best forms of light available that make natural images come to life, there are many artificial forms of lighting available to improve the standard of our images.


The most common light source used by professional photographers is probably directional lighting that can be used from the front, back or side and is provided by a flash or a tungsten.


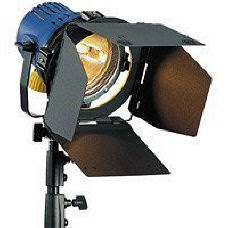
Above- Popular with professional photographers; The Tungsten light.


Above- A standard camera flash.


Considering lighting when taking photographs of people.


Front lighting reveals every detail of the subject (depending on the exposure). To get a mystifying effect, lighting from the side is always a good idea. The main illumination from the sides adds interest and dark shadows. In Back lighting, the light source remains at the back of the subject shining into the lense of the camera. When using this lighting method, it is essential to be careful as the subject may appear like a silhouette. However, this method is an advantage for shooting outdoors as the light will not make the model squint their eyes making it easier to capture their facial expressions etc. Cross lighting is also achievable but really is only suitable in a photographic studio with Tungsten lights or a bright flash.


Digital Camera Modes.


Most digital cameras have a wide range of lighting modes to suit certain scenarios. For example, the indoor mode to click without a flash. This could be useful in places such as art galleries and museums. Also the portrait and night mode which allow you to take photographs of your subject with a light backdrop using a slow shutter speed. Most digital cameras also provide a built in setting which controls your white balance aswell as a histogram to examine exposure in different conditions.

Using Light.

Basically, light is made up of all colours. If you look through a glass prism, it bursts into all different colours. Artificial lights have their own characteristics, and the photographer can utilize different light sources for different effects. But the direction of light has to be one of the most important aspects you need to consider when taking images. People look their best in side lighting and backlighting, as this produces a halo effect while overhead lighting produces a very sharp contrast of light and shadows. Another essensial factor is the strength of the lighting too. You can achieve a placid effect from diffused lighting and a and a sharpness from a stronger light. When indoors, daylight can soften your images, but artificial lighting also gives a broad scope to shoot pictures. When outdoors, getting the right lighting is more challenging. Different things need different light to bring out the best aspects of the particular object/scene you may be photographing. For example, Landscapes are better in softer lighting. Artificial light is measured in Kilowatts. Candle light is very low at 1000K, where as a standard household bulb is around 3200K. A tip for people who are taking photographs when the light is above the subject is for them to look upwards so that a pool of light is deposited across their face.

Studio task.

We took a series of photographs of a fellow student experimenting with natural lighting.

The settings on my camera were as follows;

F 5.6

ISO 400

Shutter Speed 125

Image 1. Light source; Daylight, coming from George's right hand side through the window. Quite a soft focus.

Image 2. George facing the natural light. The result of the image; Not as subjude as the first. Directional but still a soft focus.

Image 3. George facing away from the natural light. Shutter speed decreased on camera to let in more light.

Image 4. George is in the same position but there is a higher exposure/extra stop of light (ISO).

(Images coming soon).

Fortnightly task 1. REFLECTION.

Every week, we are asked to produce one photograph for the tutorial we attend every two weeks. We are given a word/theme to base our photograph on and we can be as creative as we like and shoot an image of anything we desire, as long as it represents the word/theme.
This week, the theme was REFLECTION.
I experimented with different uses of light, different angles and reflections, low and high aperture and shutter speed on the journey to creating my final outcome. Here are a few of my favouite images from this series;


I really admire the lighting on the images above. It really flatters the models skin tone and also affects the overall feel of the pictures. The atmosphere is a complete contrast compared to the photographs below; there is a warm feel to the ones above and a cold, omnious feel to the black and white images..

Below, is the image I decided to choose for my final piece.
My aim within this photograph was to produce an identical reflection on the subject involved which I think I have successfully done. I also wanted to create an image with a deeper meaning; not just something obvious. The model looks as if he is reflecting upon his thoughts, so as well as that aspect, there is the literal idea of reflection included; using the mirror in the image. I think the black and white theme of the picture and the shadows created within the image sets the atmosphere well, and the lighting coming from the side of the mirror almost seperates the reflection and the actual subject. I think the composition has been balanced out very well.


I come across a famous Photographer from Serbia who specialises in shooting reflection scenes. His name is Vlado Marincovic. He tends to concentrate on architectural aspects rather than using people, but he captures reflection spectacularly. Here's a few examples of his imagery.


The compositions are all very central in his images. Another thing I have noticed is that he tends to take the majority of his photographs outdoors.


Wednesday 11 November 2009

Different lighting techniques with Andrew Farrington. 11th November, 2009.

Todays aim was all about trying to grasp the understanding of how different lighting methods effect an image in positive ways and negative ways. In the studio, we specifically worked with glass objects such as perfume bottles to see how reflections from light would react on the glass surface. We used six different lighting angles using a soft box through acrylic, aswell as experimenting with backlighting to aim for graduated backgrounds.

Above; Andy adjusting the set.

Above; The general setup used for this shoot.

The camera settings for this task were as follows;
Low Apperture- F 5.6
Iso- 400
AV Setting

Image 1.

To take this photograph, the bottle was placed on a 45 degree angle to the softbox, and the softbox was placed to the right of the table. Hence the reason why the left side of this image is a lot darker than the right. I don't think this is a particularly pleasant image. It is very dark, dull and I think it needs more exposure of light to brighten it up a lot more from a different angle.

Image 2.

This image is even darker than the last. The lighting technique used for this photograph did not improve the visual impact in any way, but in my opinion made it a whole lot worse. The bottle had a softbox shining directly above it on a slight angle. I think the light needed to be a lot more balanced to lighten the image and coming from other angles around the set.

Image 3.

In this image, the bottle is lit from underneath and the back of the table with two softboxes. I like the effect this method gives. The graduated background gives a really professional touch to the image and draws your eye to the product situated in the centre.

Image 4.


This is exactly the same settings as image number 3 (the bottle is lit from underneath and also from the back of the table with a softbox), however lower angle lighting was used. Again, the finished photograph looks very professional, and the lighting really flatters the product. It is a great improvement from the first image.

Image 5.

With this image, I shot downwards on a 45 degree angle to capture the writting on the perfume bottle. The effect is not as harsh as the last two photographs taken. The exposure looks to have been increased but it hasn't; its the angle of which the photograph was taken. It is quite bright, and the writting on top of the perfume bottle lid is easily visible which is what the aim was when photographing this image. This form of lighting is therefore the most suitable so far for making text visible.
Image 6.


The softbox light was placed underneath and another was moved closer to the perfume bottle and placed at an angle. Andrew placed white card an an angle across the light to reflect light onto the lid. This process is called Flagging. If you look at the black lid, I took the shot at a certain angle so you can see what a difference using the white card made. The left side of the bottle is a lot clearer than the right side.

Image 7.

For this image, only natural daylight was used. The bottle does not look very clear compared to the other images. I don't think this lighting method is suitable for the type of product I was photographing (glass) due to the light being too harsh and bright. All detail is lost and there is no shadows being created to define any aspects of the product.

Tuesday 20 October 2009

My social networking sites.

You can view some of my photography on the following sites;

First ever blog entry! The work so far...

Hello, my name is Faye Rambadt, and I have just started a course at Blackburn university centre studying an FD course in Photographic Media. So far, myself and my fellow students have been asked to carry out certain pieces of independent research mainly in our History of Art Lectures with Chris Aughton, on artists relating to certain topics/pieces of art work we study in class time. We are instructed to take notes and when researching and annotating, we need to consider four vital questions;
  • How does this relate to you and your subject area (Photography)?
  • In what ways have we developed and changed from this time?
  • In what ways does Art & Design function today compared to back then?
  • What questions does looking at this specific subject raise?

We have also been taught how to use the basic tools and editing techniques in 'Adobe Photoshop Light Room 2' with our personal tutor John Harrison. Andrew Farrington has been showing us different lighting techniques with natural daylight and and natural daylight. We have compared the two to see which lighting method gave us the best exposure when taking a photograph for a specific scenario. Andy has also discussed with us different types of lighting equipment (their purposes and how they are operated etc) the characteristics of lighting, and exposure such as the aperture (F numbers and depth of field), focus and shutter speed (fractions of speed). We took some images on our Digital SLR cameras, which I will upload shortly.